There was a time when I thought that going on photo workshops was a waste of money. My attitude was that I was a good photographer, I didn't need to pay a lot of money for a professional to give me tips. Although they would be welcomed and a nice addition, at first glance it just didn't justify the cost of many of these trips. At least not until I started to do some traveling on my own and discovered what the cost of those trips was really about. I compared my photos to those that did go on the trip. Where in the world was that shot? I never saw that place! Wow, look at the lighting, I should have gone in the afternoon rather than in the early morning.
Are you following me here? It isn't about the camera knowledge, the professional expects you to have a relatively good working knowledge of your camera and the basic photography skills. That is unless you took a beginner class in which case you probably haven't traveled too far at all. Those can be found online and performed in your backyard or home area. The professional guide expects to provide you with situational tips, but mostly what you're paying for is the knowledge of the area. Where the good shots are, some that aren't on the regular tourist routes, and when the best time to visit these spots are.
I lived outside the Smoky Mountain National Park and photographed extensively there. I was always running into photo groups run by such well known photographers as Tony Sweet. I looked up his workshops and marveled at the prices. Well, of course he is very well know and I'm not, he is a professional photographer and I'm not, but along with that his workshop success came from his knowledge of the area. He knew exactly when to be where. I realized that was what he was really selling, because I often ran into his group when I had planned to go shoot the same area. You see, I too knew the area. But I would sure consider going on one of his workshops on Whidby Island, WA. Going it on my own there was totally unproductive. Not to mention these guys often have special permission to go places we as individuals can not go.
The other time that a photo tour/workshop is highly recommended is overseas. The professionals have been there time and time again. They know where it is safe, the best place to stay and eat. It is also much safer to travel in numbers. These trips are often not too much more expensive than if you booked and planned everything on your own. They provide hotels and these are obtained at a group rate, transportation, usually a van and it too is included in the price. Some times some meals are included. One of my dream trips would be to go to Istanbul, Turkey and Venice, Italy with Jim Zuckerman. I know I would be safe and he actually hires models during the Festival of Venice that wear traditional costumes and provide some awesome photo memories and a fun time.
I chose to talk about Tony and Jim because I know them, but if I didn't how would I find a trip or guide that would provide good quality and maybe isn't so well known. That's easy, the internet. Look at their work. Most of guides post on FB now and have web sites of their work. They include such accolades as publications as well. Also, if they are local to the area you are going, they may not be published world over like Tony and Jim, but that doesn't mean they are any less skilled as a photo guide. The big answer is check out their work.
In an earlier post I wrote that getting a mentor is a way of improving your photo skills. This doesn't have to be in person either. For some time now I've been friends with Aphoto4 You on Face Book. She now has a new page just for her work, NATURE Photography by Aphoto4you. Her work is incredible, she is located in the Yellowstone, Tetons and the Glacier National Park areas. To my knowledge she is not world famous but I would hire her as my guide in a minute. She truly knows where to go if you want wildlife, or landscapes. How do I know this? Her work is posted for all to enjoy.
That being said, will I take my own advice on my trip to Yosemite next week. Yes, I have signed up with John Senser, to photograph Yosemite Falls at night with a full moon to capture a moonbow. I considered trying this on my own then realized, I've never been to this park, I'm not sure what I'm looking for, some posts on this say you can't readily see it but the camera can pick it up. Time to take the workshop, with a small group of like minded individuals and one professional that has spent his entire adult life doing this in this park. It's worth the money $82 for 4 or 5 hours. The next post you'll read here will be about my Yosemite trip. Until then
Happy Shooting!
Laura
Monday, April 30, 2012


Saturday, April 14, 2012
Learn to See Your Surroundings; You Just Might be Surprised
A little over a year ago I moved to the Southern California Desert. I was horrified to find that there is nothing to photograph. I had become spoiled with the lush rich variety of the Smoky Mountains and all I saw out here was brown.

I took pictures and they all looked the same, I eventually quit, but was not happy. I am passionate about photography so I occasionally would take a trip to the coast and shoot some, but it just wasn’t enough. I of course complained to my friends that it’s awful, all brown, nothing to shoot, until they finally got tired of it and told me there is pleanty to shoot, I just wasn’t looking. People that live out here truly believe the desert is beautiful but I couldn’t see it. Finally I bought some books on desert trails, and began asking, not complaining about where to go photograph and hike. My life changed, I began to see things different, I had to really look hard it’s not as easy as point and shoot and you have a gread landscape like I was used too. But then challenge is what makes you grow as a photographer.
I learned that in the desert you don’t shoot a lot of landscapes, but it is better to shoot smaller subject areas to bring out the color and often subject. Wild life is all pretty small and due to the heat are not wandering around like the bears of the Smokys or the deer of the Appalachian and Cascade mountain ranges. There is no water for beautiful reflections or streams for curves to draw the eye in toward the subject. You have to think micro. No . . . not macro, micro as in a small area with a definate subject. Shoot it to make it look like a landscape. In other words I had to learn how to look at my environment in a different way, then boom the desert became a place of numerous photo opportunities.
Here are some examples. The first photo was taken of the windmill farm using my tried and true landscape style of the Smoky Mountains. It's a pretty blah photo!

Below is the windmill farm at sunrise the next morning, with the main focus on the sky and the windmills. Leaving out the background with all the clutter of mountains and windmills, greatly improves the aesthetics of the picture. (At least in my opinion)

Another example of viewing the world as micro environments was taken on the Art Smith Trail in Desert Palms, CA. I took a landscape shot of these red flowers with the rocks and mountains in the background. Once again, a not so compelling shot.

However, after looking at it through the micro point of view I chose to shoot just one branch of the tree with the interesting rock formation in the background. Once again the shot below is a much more appealing photograph.
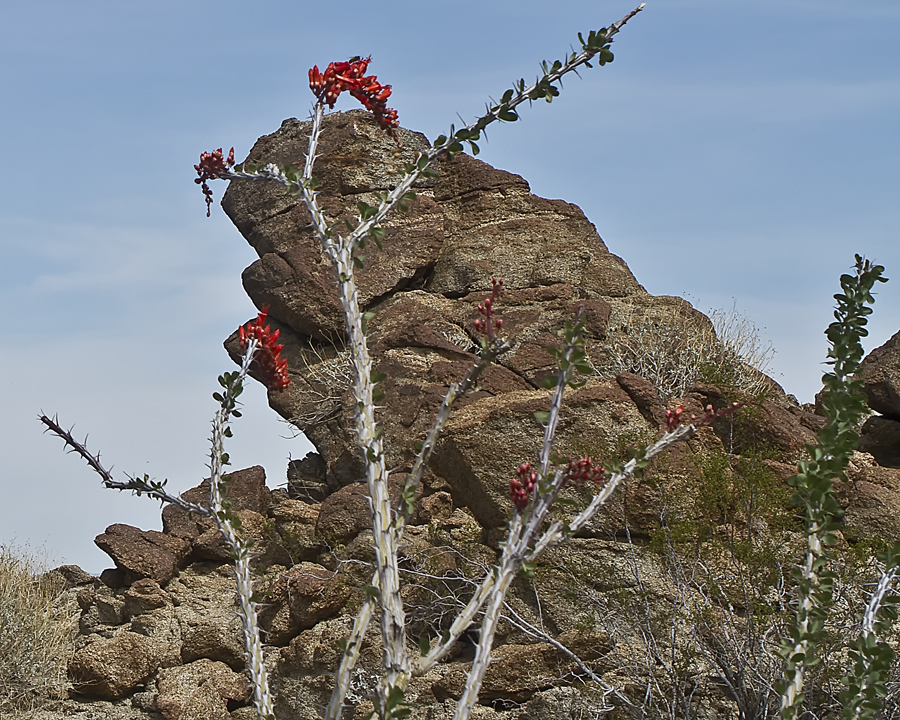
The shot now has depth and character. I'm learning a new way of seeing the world and that in some cases less truly is more. I am no longer stagnant in my photography but growing by leaps and bounds. I still miss the Smoky Mountains, but embrace the new challenges ahead.
Happy Shooting,
Laura
Thursday, March 1, 2012
Don't Settle for being a Good Photographer; Become an Outstanding Photographer
How do I do that you ask? It will not come overnight, but it will be a fun journey and it keeps you involved with your passion, even if you are not actually clicking that shot.
My journey begins and continues with research; studying photographs taken by others to determine what about that particular shot is so appealing to me or what is it that makes it just another snap shot. I have learned to pay close attention to the light, the lines, the color, clarity or bokah and how they are all put together to form the overall composition and tell a story.
Here is an example. I took this photo in Joshua Tree National Park.


A must read for improving your photography. View articles or subscribe at Petersen's Photo graphic Magazine
After looking at the two shots I realized that although mine was nice, it did not have the depth perspective Jim Zuckerman achieved by composing his shot with large boulders in the foreground. He also used shade and shadows to give it feeling as well as the warm late afternoon light.
I have purchased every volume of this magazine and highly recommend it. Mr. Zuckerman himself advocates using this method of learning and in fact used it himself when he was starting out. He is now a world leader in outdoor photography and composites.
Reading books, photo magazines, articles on the internet (Trey Ratcliff has a free tutorial on HDR on his web site, “Stuck in Customs”), blogs of professional photographers as well as friending other photographers on FaceBook are also great tools for improving your skills. When you are researching, look for photographers that do the same type of photography you are interested in. For example following Brenda Tharp when you are interested in portrait or baby photography would not benefit you in the least. Many if not most successful professional photographers have blogs discussing various aspects of photography. Some, like Chris Marquardt have two wonderful pod casts (“Photography Tips from the Top Floor” and “Daily Photo Tips”) that are free and very informative. From time to time he will offer an assignment or challenge encouraging you to put into practice the discussion of the podcast. Engaging in photography research keeps you up to date and involved, even when you can’t be out shooting those prize pictures. This will help you stay interested and excited about shooting because you literally see the improvement and feel satisfaction rather than frustration when you know how or at least have an idea how to handle a challenging situation, be it lighting, weather or what to do with all those buttons on your camera. (If you don’t already know what the buttons do I strongly suggest you learn them well. Especially if you plan on taking any workshops which many of these professionals offer.. Feild instructors generally require that you have at least a decent working knowledge of your camera.)
And finally, practice taking pictures using different settings, different lens and keep a small notepad handy to write down the settings and lenses you used for each shot. Study them with your notes so that you will know what tools to use to get the effect you are seeking. With digital photography this is very easy and not at all costly. I learned using film and it was an expensive education and I understood when people didn't want to burn the money with this type of learning. Now there is no reason not to.
Now get out there and have fun learning about your hobby/passion. I will be.
Happy Shooting,
Laura
My journey begins and continues with research; studying photographs taken by others to determine what about that particular shot is so appealing to me or what is it that makes it just another snap shot. I have learned to pay close attention to the light, the lines, the color, clarity or bokah and how they are all put together to form the overall composition and tell a story.
Here is an example. I took this photo in Joshua Tree National Park.

I liked the shot, felt it was a good shot until I saw a simular shot taken by Jim Zuckerman. It was on the cover of Petersen's Photo Graphic magazine, Volume 2.

A must read for improving your photography. View articles or subscribe at Petersen's Photo graphic Magazine
After looking at the two shots I realized that although mine was nice, it did not have the depth perspective Jim Zuckerman achieved by composing his shot with large boulders in the foreground. He also used shade and shadows to give it feeling as well as the warm late afternoon light.
I have purchased every volume of this magazine and highly recommend it. Mr. Zuckerman himself advocates using this method of learning and in fact used it himself when he was starting out. He is now a world leader in outdoor photography and composites.
Reading books, photo magazines, articles on the internet (Trey Ratcliff has a free tutorial on HDR on his web site, “Stuck in Customs”), blogs of professional photographers as well as friending other photographers on FaceBook are also great tools for improving your skills. When you are researching, look for photographers that do the same type of photography you are interested in. For example following Brenda Tharp when you are interested in portrait or baby photography would not benefit you in the least. Many if not most successful professional photographers have blogs discussing various aspects of photography. Some, like Chris Marquardt have two wonderful pod casts (“Photography Tips from the Top Floor” and “Daily Photo Tips”) that are free and very informative. From time to time he will offer an assignment or challenge encouraging you to put into practice the discussion of the podcast. Engaging in photography research keeps you up to date and involved, even when you can’t be out shooting those prize pictures. This will help you stay interested and excited about shooting because you literally see the improvement and feel satisfaction rather than frustration when you know how or at least have an idea how to handle a challenging situation, be it lighting, weather or what to do with all those buttons on your camera. (If you don’t already know what the buttons do I strongly suggest you learn them well. Especially if you plan on taking any workshops which many of these professionals offer.. Feild instructors generally require that you have at least a decent working knowledge of your camera.)
And finally, practice taking pictures using different settings, different lens and keep a small notepad handy to write down the settings and lenses you used for each shot. Study them with your notes so that you will know what tools to use to get the effect you are seeking. With digital photography this is very easy and not at all costly. I learned using film and it was an expensive education and I understood when people didn't want to burn the money with this type of learning. Now there is no reason not to.
Now get out there and have fun learning about your hobby/passion. I will be.
Happy Shooting,
Laura
Friday, February 3, 2012
Getting Ready for that Trip of a Lifetime
As photographers we all have places we dream of going and photographing, our photo bucket list if you will. When we get the chance to visit one of these places how do we prepare? Generally we choose these places because we have seen pictures of them and want the chance to take our own. For me such a place is Yosemite National Park. Of course Ansel Adams has some of the most documented photos of the park but there are countless others, and now my opportunity is coming in May. In this post I'm going to address how I prepare for such a visit so that I can make the most of my time by actually taking pictures, not running around looking for a great spot or wondering why when I did find a spot my shot doesn't look as good as others pictures. Hopefully this will aid in others preparation for their bucket list trip.
The first step after setting the dates and making the reservations for lodging is to do research. Yes, the ugly word from school. The one we all thought we were finally done with. I promise there are no written assignments here, simply pure fun. With the internet we have opportunities that no other past generations have enjoyed, instant information and lots of it. Start general and simply do a search of your destination, in my case Yosemite National Park. Having done this I found sites that have detailed explanations of hikes, views, amenities, distances from place to place, maps and of course pictures. I start by getting maps. As I locate information on trails, and see pictures that I would like to have a go at I can mark them on my map. I also get a good idea of distances from place to place. Yosemite is a very large park, I can't possibly see, hike and photograph everything I would like to in 4 days. With that piece of reality hitting me square in the face, I must plan carefully.
Armed with road maps, trail maps, topo maps, shuttle maps and of course just the general park map, I go looking for the views I most want and what area and trails have the most to offer for the time I have available. Again, the internet is a great source, Flickr is a great start, as is Face Book and professional photographers web sites. Also, printed books. Many photographers make money writing and there are several books out there, especially on very popular areas for photographers, that not only offer ideas of shots but have specific information about how to get there, when is the best time of year, day and some even off advice on camera settings and filters. These books are usually small enough to carry in your backpack, daypack or camera bag. I purchased two such books for less than $10.00 each. (I would not advise ordering these off the internet until you have an opportunity to look through them and make sure they will be helpful. I found mine on the internet, went to the local book store and looked through them and chose the two I purchased from several I found on the internet. One of the books was so bad that it would have been a terrible waste of money.)
Next I will spend weeks, reading and creating my itinerary so that when I arrive at the park I'm going to utilize my time well and not waste time looking for information on the park and how to get around. A word of caution here, don't overbook your schedule, allow for the incredible sky or the wildlife that just happens to show up as you're getting ready to move on. Photography is about the moment, great lighting is not to be wasted because you feel you have to get to the next picture. Your next picture just came to you. Without ever moving your tripod you can create several very different scenes as the lighting changes.
As you are doing your research, don't forget your gear. I posted on facebook that I was starting to get my gear ready, remember my trip isn't until May, and someone posted questioning getting my gear ready so soon. If you are not a professional photographer this might be wise. I discovered that I will need some filters that I do not own in order to really capture Yosemite landscapes well. (Part of my research) After having read this in one of my purchased books on photographing Yosemite I started researching filters. For this I've used You Tube demonstrations and contacted some of my Photographer friends on face book. If you are not on facebook you should sign up and start a circle of friends that you can share your passion of photography. Whatever you do though do not sign up, find a professional and start asking for help. Build a relationship first, you will find it rewarding and that for the most part they will be glad to help on occasion. They will visit your site and comment on the photos you post unsolicited and the feedback is invaluable as you grow in your hobby. (If you want private lessons make sure you find a photographer that does that and pay for it. Remember you expect to be paid for your time in your field. Be courteous when asking for that occasional help.
When you discover that there is camera equipment that you need to purchase, do so in a timely manner so that you have plenty of time to learn to use it. Trying to figure out how to attach a speedlite or combination of filters when the picture is in front of you is a very bad way to learn. I can almost guarantee that the shot will be gone by the time you figure it out at worst and at best the shot didn't come out like you thought because after the fact you learned of another or better way to use the tool.
Now! Go plan that bucket list trip and most of all, Happy Shooting.
Laura
The first step after setting the dates and making the reservations for lodging is to do research. Yes, the ugly word from school. The one we all thought we were finally done with. I promise there are no written assignments here, simply pure fun. With the internet we have opportunities that no other past generations have enjoyed, instant information and lots of it. Start general and simply do a search of your destination, in my case Yosemite National Park. Having done this I found sites that have detailed explanations of hikes, views, amenities, distances from place to place, maps and of course pictures. I start by getting maps. As I locate information on trails, and see pictures that I would like to have a go at I can mark them on my map. I also get a good idea of distances from place to place. Yosemite is a very large park, I can't possibly see, hike and photograph everything I would like to in 4 days. With that piece of reality hitting me square in the face, I must plan carefully.
Armed with road maps, trail maps, topo maps, shuttle maps and of course just the general park map, I go looking for the views I most want and what area and trails have the most to offer for the time I have available. Again, the internet is a great source, Flickr is a great start, as is Face Book and professional photographers web sites. Also, printed books. Many photographers make money writing and there are several books out there, especially on very popular areas for photographers, that not only offer ideas of shots but have specific information about how to get there, when is the best time of year, day and some even off advice on camera settings and filters. These books are usually small enough to carry in your backpack, daypack or camera bag. I purchased two such books for less than $10.00 each. (I would not advise ordering these off the internet until you have an opportunity to look through them and make sure they will be helpful. I found mine on the internet, went to the local book store and looked through them and chose the two I purchased from several I found on the internet. One of the books was so bad that it would have been a terrible waste of money.)
Next I will spend weeks, reading and creating my itinerary so that when I arrive at the park I'm going to utilize my time well and not waste time looking for information on the park and how to get around. A word of caution here, don't overbook your schedule, allow for the incredible sky or the wildlife that just happens to show up as you're getting ready to move on. Photography is about the moment, great lighting is not to be wasted because you feel you have to get to the next picture. Your next picture just came to you. Without ever moving your tripod you can create several very different scenes as the lighting changes.
As you are doing your research, don't forget your gear. I posted on facebook that I was starting to get my gear ready, remember my trip isn't until May, and someone posted questioning getting my gear ready so soon. If you are not a professional photographer this might be wise. I discovered that I will need some filters that I do not own in order to really capture Yosemite landscapes well. (Part of my research) After having read this in one of my purchased books on photographing Yosemite I started researching filters. For this I've used You Tube demonstrations and contacted some of my Photographer friends on face book. If you are not on facebook you should sign up and start a circle of friends that you can share your passion of photography. Whatever you do though do not sign up, find a professional and start asking for help. Build a relationship first, you will find it rewarding and that for the most part they will be glad to help on occasion. They will visit your site and comment on the photos you post unsolicited and the feedback is invaluable as you grow in your hobby. (If you want private lessons make sure you find a photographer that does that and pay for it. Remember you expect to be paid for your time in your field. Be courteous when asking for that occasional help.
When you discover that there is camera equipment that you need to purchase, do so in a timely manner so that you have plenty of time to learn to use it. Trying to figure out how to attach a speedlite or combination of filters when the picture is in front of you is a very bad way to learn. I can almost guarantee that the shot will be gone by the time you figure it out at worst and at best the shot didn't come out like you thought because after the fact you learned of another or better way to use the tool.
Now! Go plan that bucket list trip and most of all, Happy Shooting.
Laura
Monday, January 9, 2012
Artistic Expression Required
We have all spent untold hours, taking pictures only to get them home and when viewed we discover they aren't at all what we wanted or expected. What do you do with them? I used to delete them and hope for another opportunity to re-shoot the subject. Sometimes that works, especially if you are able to return the the spot you were photographing. However, what if that isn't the case, how do you save these shots and make them more that mere presentable snapshots?
Photoshop is the answer, not what you're thinking. These shots just can't be repaired to create that perfect picture in the sense you're thinking. Think outside the box for a minute. Change the goal of the shot from the perfect picture into an artful masterpiece. Your own unique interpretation. Never let on that it wasn't what you intended and people will think you're the most creative, artsy person they know.
Photoshop is a powerful tool and can do a lot more than tweek photos. Using the available filters and sliders you can literally change the shot so dramatically it will look nothing at all like a photograph but become a masterful piece of art. It is almost as much fun as taking the pictures. Below are a couple of my own examples.

This is Mabry Mill along the Blue Ridge Parkway in Virginia. I had hoped to get some clear shots of the mill that included a lot of detail and the reflection on the water. Having never been there before I did not know what kind of lighting to expect. Of course it was awful! But, I had to make due, I wasn't going to be able to come back in the morning for the perfect lighting situation. HDR wouldn't work well either because it was too windy and the shrubs and trees would become a blur. I took my shots and when I got home I went to photoshop to make the best of it. It couldn't be repaired so -- here we go -- outside the box.
While still in RAW (Always shoot in RAW, it has so much more information and detail, making it easier to tweek). I increased the fill light to bring out the detail in the water wheel and deeply shadowed side of the mill, then saved the file as a TIFF. Opening the TIFF in photoshop and choose to desaturate all but the reds, making the mill stand out from the rest of the surrounding area. Next I went to the filter tab and chose the poster filter. (No set numbers here, this is an individual piece of work, make it to your liking. Stop trying to please everyone else.) What I wanted the end product to look like was anything but a photo. (See the detailed segment below) When printed on canvas this really works and I have taken a so so shot and made it a successful piece of art.

Now see if you can figure out how I created the pictures below and get out some of your own pictures and begin to see what the filters and sliders in photoshop can do for you. It's almost as much fun as taking the pictures and certainly just as rewarding when you create that perfect and unique personal interpretation and expression.


One final note. Even if you don't use photoshop, experiment with whatever program you do use for processing and tweeking. It is a lot of fun and can be very rewarding.
Photoshop is the answer, not what you're thinking. These shots just can't be repaired to create that perfect picture in the sense you're thinking. Think outside the box for a minute. Change the goal of the shot from the perfect picture into an artful masterpiece. Your own unique interpretation. Never let on that it wasn't what you intended and people will think you're the most creative, artsy person they know.
Photoshop is a powerful tool and can do a lot more than tweek photos. Using the available filters and sliders you can literally change the shot so dramatically it will look nothing at all like a photograph but become a masterful piece of art. It is almost as much fun as taking the pictures. Below are a couple of my own examples.

This is Mabry Mill along the Blue Ridge Parkway in Virginia. I had hoped to get some clear shots of the mill that included a lot of detail and the reflection on the water. Having never been there before I did not know what kind of lighting to expect. Of course it was awful! But, I had to make due, I wasn't going to be able to come back in the morning for the perfect lighting situation. HDR wouldn't work well either because it was too windy and the shrubs and trees would become a blur. I took my shots and when I got home I went to photoshop to make the best of it. It couldn't be repaired so -- here we go -- outside the box.
While still in RAW (Always shoot in RAW, it has so much more information and detail, making it easier to tweek). I increased the fill light to bring out the detail in the water wheel and deeply shadowed side of the mill, then saved the file as a TIFF. Opening the TIFF in photoshop and choose to desaturate all but the reds, making the mill stand out from the rest of the surrounding area. Next I went to the filter tab and chose the poster filter. (No set numbers here, this is an individual piece of work, make it to your liking. Stop trying to please everyone else.) What I wanted the end product to look like was anything but a photo. (See the detailed segment below) When printed on canvas this really works and I have taken a so so shot and made it a successful piece of art.


The Grand Canyon

The Blue Ridge Mountains
One final note. Even if you don't use photoshop, experiment with whatever program you do use for processing and tweeking. It is a lot of fun and can be very rewarding.
Until next time, join me on Face Book for daily updates and see what new pictures I have posted.
Have Fun with Photography,
Laura
Saturday, January 7, 2012
It's been too long
I can't believe it's been almost a year since I've updated my blog. Since moving to California my photography has slowed significantly. I'm hoping that this year I can pick it up again. I've done some photos for a design company and am promoting pet photography. I also have created a Facebook site with my photos in an effort to promote my work to a larger audience.
You can visit my site at http://www.facebook.com/pages/Photography-by-Laura-Lee/245784977832?ref=ts
Make sure you click on the photo link on the left to view my photo albums. I have organized the photos according to category or place to make it easier for my viewers to see what they are most interested in.
I hope to be more diligent this year about posting regularly on my blog.
Happy New Year and Happy Shooting.
Laura
You can visit my site at http://www.facebook.com/pages/Photography-by-Laura-Lee/245784977832?ref=ts
Make sure you click on the photo link on the left to view my photo albums. I have organized the photos according to category or place to make it easier for my viewers to see what they are most interested in.
I hope to be more diligent this year about posting regularly on my blog.
Happy New Year and Happy Shooting.
Laura
Tuesday, February 8, 2011
I Love Shooting Pictures, NOT Shooting Myself in the Foot
I was approached yesterday via Flickr mail by a very large publishing company that has offices all over the world. They are a credible publishing company and I am honored that they find my photo worthy of publication in a book. The book they wish to use my photo in is to be released on August 30, 2011 and is already on Amazon.com for pre-order.
Sounds good Right! You’re thinking I should jump at the opportunity. Why would I not?
Because I love shooting pictures NOT shooting myself in the foot. I have an investment in my equipment and time. Just because it is something I’m going to do anyway, doesn’t mean I have to give it away. It has value. I’m proud of my work and I feel if it is good enough for them to want to use, it certainly is deserving of compensation. We as amateur photographers are destroying our chances of rising to the next level by allowing our emotions to take control. Do I want to be published? You Bet I Do! But if I give my work away what message does this send to people. It tells them that I don’t believe my work is worthy. It tells them that I am a good source for them to take advantage of to make a larger profit.
The digital age has made photography a highly competitive field and many can not succeed because anyone with a digital camera can snap a decent picture, post it on Flickr and potentially get published. We get so excited that someone wants our shot we give it away. By doing this we will always remain amateurs and we make it very difficult for anyone to make a living at photography. I’ve seen many amateurs photos that are consistently excellent. But, by giving their work away, wanting to get their name out there, they are shooting themselves in the foot. We are condemning ourselves to permanent amateur status while professionals struggle because they will not and can not give their work away. A professional knows they are deserving of compensation and demand it. As amateurs I feel we are deserving of the same consideration and respect for our work. Just because it isn’t my sole means of earning a living doesn’t mean it is worthless. As photographers, amateur and professional alike we owe it to the photo industry and to ourselves to demand that respect. If we all begin to require reasonable compensation (this being the industry standard) eventually the free shots available would be the bad ones and the publishers would start to pay.
I submit to all my photography friends that we re-train the publishers and stop giving our pictures away for the thrill of publication. If it’s good enough for publication, it is good enough for compensation. If we all do this everyone will benefit, amateur and professional alike.
As for the outcome of my photo. I contacted a professional for advise about pricing. I sent my price to the publisher and have not heard back from them. I don’t expect to, they simply got back on flickr and searched for another photo that they could get for free, and that’s okay. I feel good about my decision.
Sounds good Right! You’re thinking I should jump at the opportunity. Why would I not?
Because I love shooting pictures NOT shooting myself in the foot. I have an investment in my equipment and time. Just because it is something I’m going to do anyway, doesn’t mean I have to give it away. It has value. I’m proud of my work and I feel if it is good enough for them to want to use, it certainly is deserving of compensation. We as amateur photographers are destroying our chances of rising to the next level by allowing our emotions to take control. Do I want to be published? You Bet I Do! But if I give my work away what message does this send to people. It tells them that I don’t believe my work is worthy. It tells them that I am a good source for them to take advantage of to make a larger profit.
The digital age has made photography a highly competitive field and many can not succeed because anyone with a digital camera can snap a decent picture, post it on Flickr and potentially get published. We get so excited that someone wants our shot we give it away. By doing this we will always remain amateurs and we make it very difficult for anyone to make a living at photography. I’ve seen many amateurs photos that are consistently excellent. But, by giving their work away, wanting to get their name out there, they are shooting themselves in the foot. We are condemning ourselves to permanent amateur status while professionals struggle because they will not and can not give their work away. A professional knows they are deserving of compensation and demand it. As amateurs I feel we are deserving of the same consideration and respect for our work. Just because it isn’t my sole means of earning a living doesn’t mean it is worthless. As photographers, amateur and professional alike we owe it to the photo industry and to ourselves to demand that respect. If we all begin to require reasonable compensation (this being the industry standard) eventually the free shots available would be the bad ones and the publishers would start to pay.
I submit to all my photography friends that we re-train the publishers and stop giving our pictures away for the thrill of publication. If it’s good enough for publication, it is good enough for compensation. If we all do this everyone will benefit, amateur and professional alike.
As for the outcome of my photo. I contacted a professional for advise about pricing. I sent my price to the publisher and have not heard back from them. I don’t expect to, they simply got back on flickr and searched for another photo that they could get for free, and that’s okay. I feel good about my decision.
Monday, February 22, 2010
Just thought you might like to know........
Flickr has rapidly become one of the largest online photo sharing applications allowing photographers to display their work and enjoy a community atmosphere of sharing comments, critiques and just plain fun at no cost. At least not a monetary fee, but they have written into their terms of service a section, buried in a lot of legalese that they have unrestricted rights to use anything you post on the Flickr site.
Here it is:
"With respect to Content you submit or make available for inclusion on publicly accessible areas of Yahoo! Groups, the license to use, distribute, reproduce, modify, adapt, publicly perform and publicly display such Content on the Yahoo! Services solely for the purposes of providing and promoting the specific Yahoo! Group to which such Content was submitted or made available. This license exists only for as long as you elect to continue to include such Content on the Yahoo! Services and will terminate at the time you remove or Yahoo! removes such Content from the Yahoo! Services. With respect to photos, graphics, audio or video you submit or make available for inclusion on publicly accessible areas of the Yahoo! Services other than Yahoo! Groups, the license to use, distribute, reproduce, modify, adapt, publicly perform and publicly display such Content on the Yahoo! Services solely for the purpose for which such Content was submitted or made available. This license exists only for as long as you elect to continue to include such Content on the Yahoo! Services and will terminate at the time you remove or Yahoo! removes such Content from the Yahoo! Services."
I understand that is says for the purpose of promoting Yahoo Services, but how would you feel seeing your work as an advertisement and you didn't even get a Thank you, much less a check. Respectable marketing firms pay a lot of money for art and photos and so should Yahoo.
I have several photo's that are very popular and that I do in fact sell. I have removed these from Flickr and from now on will only be posting fun shots on Flickr. I will continue to share my better shots, but on facebook and on my own web site and blog.
Flickr is a fun community and I have made many friends and learned a lot from the people on flickr. I will continue to interact with them and share my work, I will just limit it to low quality, low resolution shots so that the Flickr employees will be forced to search elsewhere.
I am not condemning Flickr, they are not doing anything illegal and many may not mind. I'm simply posting this to let others know where some of my pictures have gone.....I took them off Flickr. I also think that there may be many users that didn't get down to the part about their right to use our work, alter it and not even be required to give credit, and they need to know. I know I didn't know until a friend told me and told me where to find it and I've been using Flickr for a year now.
I hope this helps someone, and I will continue to post on Flickr, just with a little more discretion. Hope to see you all there.
Now go have fun with photography,
Laura
Here it is:
"With respect to Content you submit or make available for inclusion on publicly accessible areas of Yahoo! Groups, the license to use, distribute, reproduce, modify, adapt, publicly perform and publicly display such Content on the Yahoo! Services solely for the purposes of providing and promoting the specific Yahoo! Group to which such Content was submitted or made available. This license exists only for as long as you elect to continue to include such Content on the Yahoo! Services and will terminate at the time you remove or Yahoo! removes such Content from the Yahoo! Services. With respect to photos, graphics, audio or video you submit or make available for inclusion on publicly accessible areas of the Yahoo! Services other than Yahoo! Groups, the license to use, distribute, reproduce, modify, adapt, publicly perform and publicly display such Content on the Yahoo! Services solely for the purpose for which such Content was submitted or made available. This license exists only for as long as you elect to continue to include such Content on the Yahoo! Services and will terminate at the time you remove or Yahoo! removes such Content from the Yahoo! Services."
I understand that is says for the purpose of promoting Yahoo Services, but how would you feel seeing your work as an advertisement and you didn't even get a Thank you, much less a check. Respectable marketing firms pay a lot of money for art and photos and so should Yahoo.
I have several photo's that are very popular and that I do in fact sell. I have removed these from Flickr and from now on will only be posting fun shots on Flickr. I will continue to share my better shots, but on facebook and on my own web site and blog.
Flickr is a fun community and I have made many friends and learned a lot from the people on flickr. I will continue to interact with them and share my work, I will just limit it to low quality, low resolution shots so that the Flickr employees will be forced to search elsewhere.
I am not condemning Flickr, they are not doing anything illegal and many may not mind. I'm simply posting this to let others know where some of my pictures have gone.....I took them off Flickr. I also think that there may be many users that didn't get down to the part about their right to use our work, alter it and not even be required to give credit, and they need to know. I know I didn't know until a friend told me and told me where to find it and I've been using Flickr for a year now.
I hope this helps someone, and I will continue to post on Flickr, just with a little more discretion. Hope to see you all there.
Now go have fun with photography,
Laura
Tuesday, February 9, 2010
Tribute to Cades Cove
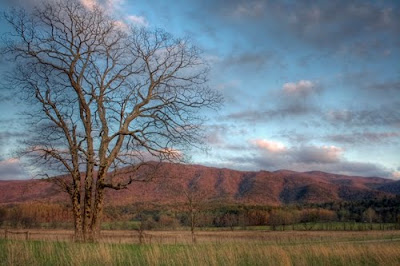
You may or may not be aware that Cades Cove in the Smoky Mountain National Park will be closing March 1, 2010 for two months to repave roads and perform other necessary repairs. For many of us it will be a loss to not make our yearly sojourn to this wonderful and beautiful place as spring unfolds it's display of new life, color and God's gift to us. In this light I offer this photographic tribute and a brief history of why this is such a special place.
Surrounded by mountains on all sides, a collection of pastures, fields, mills, barns and an assortment of other old buildings and cabins, Cades Cove is representative of what life in America used to be. The pioneer way of life.


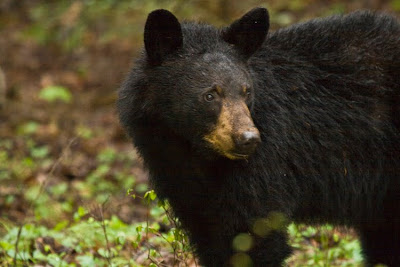
Surrounded by mountains on all sides, a collection of pastures, fields, mills, barns and an assortment of other old buildings and cabins, Cades Cove is representative of what life in America used to be. The pioneer way of life.

The national park system has undertaken the task of preserving this pioneer way of life in Cades Cove by transforming it into a historic exhibit through the rehabilitation and preservation of log cabins, barns, mills, churches and other structures. Cattle, hay and grain continue to be raised today by farmers and the park service.
Cohabitating in the Cove is a plethora of wildlife that include deer, bear, wild boar, turkey and coytoe. I would say that the wildlife for many of the Cove's visitors is the main attraction. Without fail a drive around the Loop Road will offer numerous opportunities to view deer grazing, young bucks testing their skill and strength on each other, turkey scratching the ground looking for a tasty morsel. In the spring and fall, it is not at all uncommon to come up on a bear or as in my case have the bear come up on me while I was photographing one of the cabins. (The below bear photo is the result of that delightful surprise) Early mornings in the Cove often offer a glimpse of a coyote hunting in the open fields.

Wild Turkey scratching for food

An Alert Doe

A Typical View in the Cove

A adolescent bear out looking for a meal


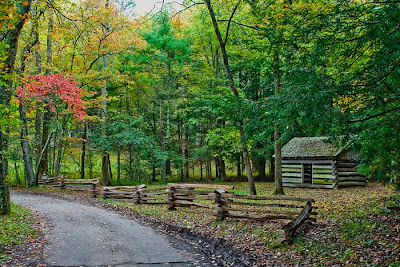




Earlier I briefly alluded to the pioneer way of life. Any discussion of the Cove would be remiss if it didn't include the settler's of the area. The first white man to permanently settle in the Cove was John Oliver who established residence in 1818.


The John Oliver Place
was occupied by the family until the establishment of the park in 1934. I have seen a photograph of this cabin with an old model A or T Ford (I'm not sure which it was an old Ford of some sort) and laundry hanging out on a clothes line to dry.
However, the first Cades Cove related land grant was given to Hugh Dunlap in 1794 for 5,000 acres. Another grant given in 1796 was to William Crowson. These grants were actually given illegally; for at that time the land belonged to the Cherokee Indians and was not open to white settlement until the treaty of 1819. Settlement began in earnest and in 1821 William Tipton purchased 640 acres from William Crowson.

One of the out buildings of the Tipton Place
William Tipton eventually ended up owning over 3,000 acres both in the Cove and on the surrounding mountain sides.

Dan Lawson Place


As the settlers began pouring into the region, the land was deforested for pastures, orchards and crops were planted. The settlers were surrounded by mountains and Hyatt Lane was the only road out. Hyatt Lane went across the cove to then Cades Cove Rd., now Rich Mountain Rd. To travel to Maryville from Cades Cove was a three day trip on horseback.

Hyatt Lane
Another Road that cuts across the cove is Sparks Lane.


Sparks Lane
The soil in the cove was fertile and farming was prosperous; corn being the main crop. However, it was not practical for the farmers to try to carry the corn over the poor mountain road into Maryville to market. Corn was selling for 6.25 cents a bushel. The farmers instead fed a majority of the corn to livestock which could be driven to the markets.
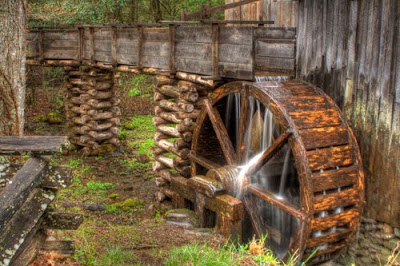
Corn was also a family staple, often ground in tub mills by individual families until such time when a community became large enough to support a water wheel powered mill. The Cades Cove community was one such community that in fact by 1870 was large enough to support more than one mill. John P. Cable's mill was a dual mill both wood and corn. John P. Cable was also a farmer and it is told that he had a large bell mounted on a pole in front of the mill for customers to ring to bring him in from the fields. The Cable mill is one of the buildings the park service has restored but much of the mill is still original.

Waterwheel of Cable's Mill
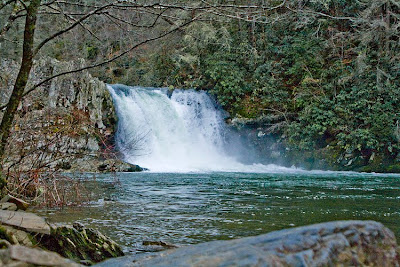
There is one other aspect of the cove to cover. Prior to the settlement of the white man the Cherokee Indians lived here. Cades Cove, Abrams Creek and Abrams falls all obtained their name from a well known Cherokee Chief, "Old Abram" who live in the nearby village at Chilhowee. According to local lore Old Abram's wife was named Kate which became Cades or Kate's Cove, in her honor.

Abrams Falls
That my friends is a brief (too brief to be of any real informational value) history of the cove and my humble attempt to capture and share some of it's beauty. In two short weeks the cove will be closing so that the park service may attend to the maintenance of some of the buildings and rebuild the well travelled Loop Road. Good Bye old friend, until your reawakening in summer. I'm sure I speak for many when I say we will miss you.
Until next time; Have fun with your photography,
Laura
Thursday, January 21, 2010
RAW is Good: and I don't mean Sushi!
I was talking with a friend of mine when I had just switched over to digital and was asking about different settings. In particular RAW. I had no idea just coming from shooting film what that meant or why use it. My friend is an excellent photographer and was also at the time taking a course on digital photography. (A real course with homework, text book and real human instructor in a classroom.) She told me that the instructor made them shoot in RAW but she saw no need for it, it simply used up too much room on a memory card and there was no other advantage. In fact she went on to say, "After this course I'm going to shoot only in jpeg.
With that said I promptly set my new digital camera on jpeg and went off to some of the most beautiful places I've ever had the privilege to visit. I shot over 1000 pictures the first week I had the camera. But nothing came out very well and I couldn't seem to be able to edit my shots the way others were. I didn't understand. After my trip, I began to read up. (I wish I had researched while I was still out in the Pacific North West) I did an experiment I set my camera to shoot both Jpeg and RAW. Wow! it didn't take long for me to recognize the difference.
Here is an example of what you can do with a RAW image.

This image was taken at 4:00 or so in the afternoon. I did a couple of things. I shot in in RAW, I used the florescent setting for the white balance to get the blue hue and then I under exposed it. I also shot it with 400 ISO to give it some texture.
When I opened the image in the RAW converter I increased the blacks, a little bit of fill light and saturation. The sky was still pretty bright so I used the brush tool and lowered the exposure on the sky only and here is the resulting shot.
I shot this to use as a background for a composite picture I have in mind. But this shot alone looks pretty good to me and I didn't have to fool with it in photoshop, just the RAW conversion software. If you haven't already........... I would suggest you become familiar with this powerful tool.
Below is the original image without any adjustments in the RAW conversion software. Not so compelling a shot.

Till the next time: Have fun with Photography!
Laura
With that said I promptly set my new digital camera on jpeg and went off to some of the most beautiful places I've ever had the privilege to visit. I shot over 1000 pictures the first week I had the camera. But nothing came out very well and I couldn't seem to be able to edit my shots the way others were. I didn't understand. After my trip, I began to read up. (I wish I had researched while I was still out in the Pacific North West) I did an experiment I set my camera to shoot both Jpeg and RAW. Wow! it didn't take long for me to recognize the difference.
Here is an example of what you can do with a RAW image.

This image was taken at 4:00 or so in the afternoon. I did a couple of things. I shot in in RAW, I used the florescent setting for the white balance to get the blue hue and then I under exposed it. I also shot it with 400 ISO to give it some texture.
When I opened the image in the RAW converter I increased the blacks, a little bit of fill light and saturation. The sky was still pretty bright so I used the brush tool and lowered the exposure on the sky only and here is the resulting shot.
I shot this to use as a background for a composite picture I have in mind. But this shot alone looks pretty good to me and I didn't have to fool with it in photoshop, just the RAW conversion software. If you haven't already........... I would suggest you become familiar with this powerful tool.
Below is the original image without any adjustments in the RAW conversion software. Not so compelling a shot.

Till the next time: Have fun with Photography!
Laura
Monday, January 18, 2010
Creativity

"For some beauty seems but an accident of creation: to Muir it was the very smile of God"
~ John Muir
Yes, this image has been manipulated in Photoshop. However, it is my personal belief that God provided us with the ability to have visions beyond what is simply put before us. We have visions about our future, that we call goals and manipulate to the best of our ability to achieve them. Why can we not have visions about our surroundings and manipulate them digitally to the best of our ability to achieve that vision? I believe that John Muir would have loved the technology we have today. I believe that he most likely would have been on the breaking edge creating visual beauty.
I am still learning to use photoshop and the above photo is a result of some of that learning: playing to learn if you will. I took the photo of the sun hiding behind the clouds coloring them in gold. There was a sliver of grey sky showing and I thought how fun it would be to shoot that and then mirror it in photoshop. A technique I learned last night watching a DVD on creating masterpieces in photoshop by Jim Zuckerman. Now there is a man with vision!
Remember most of all to have fun with your photography.
Sunday, January 3, 2010
Color or Composition
In Ketchikan, Alaska there is one of the most colorful streets I've ever seen. Both literally and metaphorically. Creek Street, the row of buildings below that are built on pilings over the water, is not a street but was the "red light district". Dolly's House, the building on the far right of the photo, is today a museum taking you back in time to the days when this row of wooden buildings were all bordellos. They were not shut down until 1953.


"In my photography, color and composition are inseparable. I see color."
~ William Albert Allard
Saturday, January 2, 2010
Photography: Pleasure or Embarrassment?
Ketchikan, Alaska
I had been sick for two days when we arrived in Ketchikan. I only took a handful of pictures, all of them using the auto setting and not much thought about composition. I barely made it back to the ship after having only walked around for about an hour. But, I still recall my trip to Alaska with pleasure.

"Most things in life are moments of pleasure and a lifetime of embarrassment; photography is a moment of embarrassment and a lifetime of pleasure."
~ Tony Benn
Friday, January 1, 2010
Happy New Year!
Today is the beginning of a new year. For many of us we look at this as a time of reflection as well as a time for new beginnings. New years resolutions are traditional and often failed as we fall back into our old routines. I believe this is what happens when we try to force upon ourselves some untimely or unwanted change. Change is uncomfortable, even if it is for the best. We grow complacent and prefer what we know over the unknown.
That being said, I'm not going to make a New Year Resolution. Instead, I'm simply going to continue my journey growing as a photographer and a person. Last month I joined the Knoxville Art and Cultural Alliance which offers numerous opportunities to display my art to a larger audience and to learn from others. I am also putting together a Basic Photography seminar in Johnson City. The date is yet to be determined, but I have already received a wonderful and positive response from people interested in learning photography.
I want to invite all of you to come and enjoy with me each new dawn and experience through the lens of the camera by following me here and at my web site PhotographybyLauraLee.com.

That being said, I'm not going to make a New Year Resolution. Instead, I'm simply going to continue my journey growing as a photographer and a person. Last month I joined the Knoxville Art and Cultural Alliance which offers numerous opportunities to display my art to a larger audience and to learn from others. I am also putting together a Basic Photography seminar in Johnson City. The date is yet to be determined, but I have already received a wonderful and positive response from people interested in learning photography.
I want to invite all of you to come and enjoy with me each new dawn and experience through the lens of the camera by following me here and at my web site PhotographybyLauraLee.com.

Happy New Year
2010
Saturday, December 12, 2009
Follow your Dreams, your Passion, your Heart
I have long been encouraged by my friends to pursue photography as a means of earning some extra income, and until now I thought they were just being kind. On Tuesday December 8, 2009 I was introduced to the Gray community as a local artist/photographer. It was the first public display of my photographs. I had no idea what to expect, was at times excited, worried, anxious and even scared. What if I invested all this time, energy and money into this and nobody showed up? I would never know until I tried and then I wouldn't always wonder IF!
Tuesday evening turned out to be the night some other events were taking place. Events I had no way of knowing about until people started to e-mail me and let me know. Only slightly daunted, I forged on with my plans. Monday I watched the weather forecast which informed me that Tuesday evening was going to be a frigid, wet and stormy night. Tuesday morning I loaded up my photos and took them to Power's Coffee Express in Gray, where the showing was to be held. I wanted to get set up early so that I wouldn't be trying to carry things into the shop in the storms. It turned out to be very good that I did, by that night it was pouring down rain the wind was blowing a steady 30 MPH with gusts up to 54. The temperature had dropped into the high 30's and I just knew that not a soul would venture out in this. I knew I wouldn't.
But they did, and the show was a success and I learned many lessons that night. I learned that planning and hard work do pay off. I learned that the Lord has blessed me with wonderful and supportive friends. (I keep having to relearn that one. I get complacent and forget). I learned to continue having a positive attitude and forging on, even when things seem to all go wrong. But the best lesson I learned is to follow your heart and your dreams.
Here are some pictures of the show and I must admit I'm still amazed that people were out in that weather looking at my photographs.


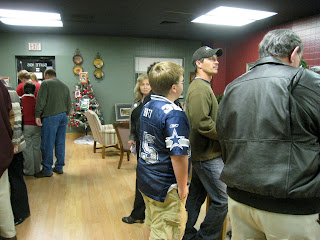

Tuesday evening turned out to be the night some other events were taking place. Events I had no way of knowing about until people started to e-mail me and let me know. Only slightly daunted, I forged on with my plans. Monday I watched the weather forecast which informed me that Tuesday evening was going to be a frigid, wet and stormy night. Tuesday morning I loaded up my photos and took them to Power's Coffee Express in Gray, where the showing was to be held. I wanted to get set up early so that I wouldn't be trying to carry things into the shop in the storms. It turned out to be very good that I did, by that night it was pouring down rain the wind was blowing a steady 30 MPH with gusts up to 54. The temperature had dropped into the high 30's and I just knew that not a soul would venture out in this. I knew I wouldn't.
But they did, and the show was a success and I learned many lessons that night. I learned that planning and hard work do pay off. I learned that the Lord has blessed me with wonderful and supportive friends. (I keep having to relearn that one. I get complacent and forget). I learned to continue having a positive attitude and forging on, even when things seem to all go wrong. But the best lesson I learned is to follow your heart and your dreams.
Here are some pictures of the show and I must admit I'm still amazed that people were out in that weather looking at my photographs.

Rick and his wife Zella; without their support, encouragement and help I could have never done this. Rick taught me to follow your dreams with passion. Thank you Rick and Zella.

Donna, my biggest fan. It was Donna who first suggested I should sell my photos, and pushed me until I did. Thank you Donna for your friendship and unwavering belief in me.

My first sale, an 16 X 20 framed print of the James Oliver Cabin in Cades Cove, Smoky Mountain National Park in Tennessee. And so it begins........

Did I really draw a crowd?

As you can see;
Follow your Dreams, your Passion, your Heart and they really Do Come True!
Thanks for stopping by.
Merry Christmas,
Laura
Thursday, November 19, 2009
Learn to Play, Play to Learn
Recently I have been working on expanding my skills in photoshop. I have watched some of the online tutorials, purchased a disc on some of the basics and last but not least I have played and pushed bars and buttons, slid sliders and observed what changes were made to my image by doing this. One of the best features of Photoshop CS4 is the ability to work in layers never really altering the image unless you decide that is what you want. Therefore, if you don’t like something you simply go to your history tab and delete the last change which is in its own layer and poof, it is gone. No harm done. Really neat stuff. Furthermore, I have learned more about this program and its abilities through this playing method than I have with all the time spent reading and watching tutorials, which often times assumes you know more than you do or are so basic it is of no use at all.

Above are two shots, one is the original shot taken straight from the camera. This shot was doomed from the very beginning. It was mid afternoon and the sun was shinning straight into the lens. I angled around to get into the shade and then the lens distortion made the old train station look like it is leaning back away from me. I took 5 shots intending to do an HDR. I processed it in Photomatix and the sky has a halo around the building. (I still haven't figured out how to fix that) First though I wanted to correct the lens distortion so I opened the HDR image in Photoshop and clicked on Filter--> Distort--> Lens correction. The image appears with a panel to the right with all manner of sliders bars. At the bottom you may choose to use a grid if you just want to perfectly align the image either horizontally or vertically. Just play around with these sliders some of the effects are interesting and it's good knowledge to have when you do have a nice image you want to save from lens distortion. The last button I clicked in the section was the on the bottom right, labeled Edge. There are three choices, background color, edge extension and transparency. I chose edge extension and it produced what you see in the image on the right. Kind of added to the story of the Old Train Station falling into decay.

In attempting to create an image for my Christmas cards I have met with many hours of frustration because I can't get the exact look I want. The first image is an HDR of 3 exposures. The problem with shooting Christmas trees is the varying degrees of light and the different types of lighting. I was hoping that HDR would help solve that, but there obviously is need for Photoshop. Once again I have not succeeded in achieving the look I want but while playing around with different features to see what they do, I got the second shot. Not Christmas card stuff, but fun, at least I like it! This was achieved by opening the image in Photoshop and clicking on Filter--> Stylize--> Glowing Edges. From there all that really needs to be said is have fun.
Here are a couple more images. See if you can figure out what filter was used.


So........What is my point? Simple; learn to play and play to learn. I have had hours of fun playing with photoshop and have created some really cool effects. Below I have posted some of the the resulting images from my playing to learn, and expect to have hours more of cheap entertainment with photoshop as I learn more about the plethora of filters, textures and other tools I don’t even know how to categorize.


In attempting to create an image for my Christmas cards I have met with many hours of frustration because I can't get the exact look I want. The first image is an HDR of 3 exposures. The problem with shooting Christmas trees is the varying degrees of light and the different types of lighting. I was hoping that HDR would help solve that, but there obviously is need for Photoshop. Once again I have not succeeded in achieving the look I want but while playing around with different features to see what they do, I got the second shot. Not Christmas card stuff, but fun, at least I like it! This was achieved by opening the image in Photoshop and clicking on Filter--> Stylize--> Glowing Edges. From there all that really needs to be said is have fun.
Here are a couple more images. See if you can figure out what filter was used.


I hope you enjoyed your visit and have been inspired to leave your comfort zone to play and learn.
As always, Have fun with Photography and don't forget to visit me at PhotographybyLauraLee.com
Till next time,
Laura
Saturday, October 24, 2009
Fall Fun
Fall is a wonderful time of year and especially for photography. The temperature is perfect for outdoor activities, such as a day hike on your favorite trail, or an adventure on a new trail. For those less inclined or unable to make such a trek a late afternoon drive promises to yield a plethora of photo opportunities. The shorter days insure that perfect lighting without having to get up in the wee hours of the morning or staying out until 10:00 - 10:30 P.M. for the golden hours of perfect light.

I began in my back yard this year by shooting the mums in the pots on the back deck. These types of shots are fun, and good practice exercises with lenses and lighting and the results make a perfect desktop shot on your computer. The next subject to catch my attention was foliage behind an antique bell mounted on a 4 X 6. I like the colors but felt that if I were to maintain a sharp depth of field the bell would be lost in a busy mass of brush. I decided to blur the background and focus on the bell alone. This resulted in a colorful shot while the bell remains the unquestionable subject.

Leaving the backyard we notice scenes that throughout the majority of the year are mediocre at best, become spectacular as the fall colors take over. It is difficult to take a picture during the fall season that isn’t filled with color and beauty. However, what many of us neglect to do is to take advantage of it by pulling over and snapping a picture. Here are some I have taken as the season progresses and I’ve made no effort to search for these shots on trails, I simply took a moment to pull over and snap the shot.

Enhancing Filter used for 5 Exposure HDR

In the Library Parking Lot


Last but certainly not to be overlooked are the Fall shots that we go out and search the parks, walk the muddy, rocky trails; in short go to extremes to capture. I have been known to drive and walk for miles every week just waiting for the peak color. So far this year I haven’t found anything absolutely out of this world yet, but I’m still looking. Looking though, shouldn’t start when the leaves begin to turn colors, but rather all year, taking note of what trees are in an area, barns or just whatever suits your fancy. Then, when the time arrives all that needs to be done is to check out the chosen spots frequently. It took me two years to get the shot below, to arrive on the day when everything was just right. A short one mile hike up the hill and finally, my diligence and patience paid off.

I hope that you're now encouraged to carry your camera, and take those shots that you see regularly but never do anything about. So get out there and Shoot, Shoot, Shoot! Above all else though, Enjoy yourself!
Subscribe to:
Posts (Atom)

 Posts
Posts


